Building Galaxy Tools
Command-line utilities to assist in building and publishing Galaxy tools.
Links
- Planemo - Command-line utilities to assist in building and publishing Galaxy tools.
- Best Practices for Creating Galaxy Tools
- IUC Tools repository
- Tutorial “Building Galaxy Tools”
- Tutorial “Publishing Galaxy Tools”
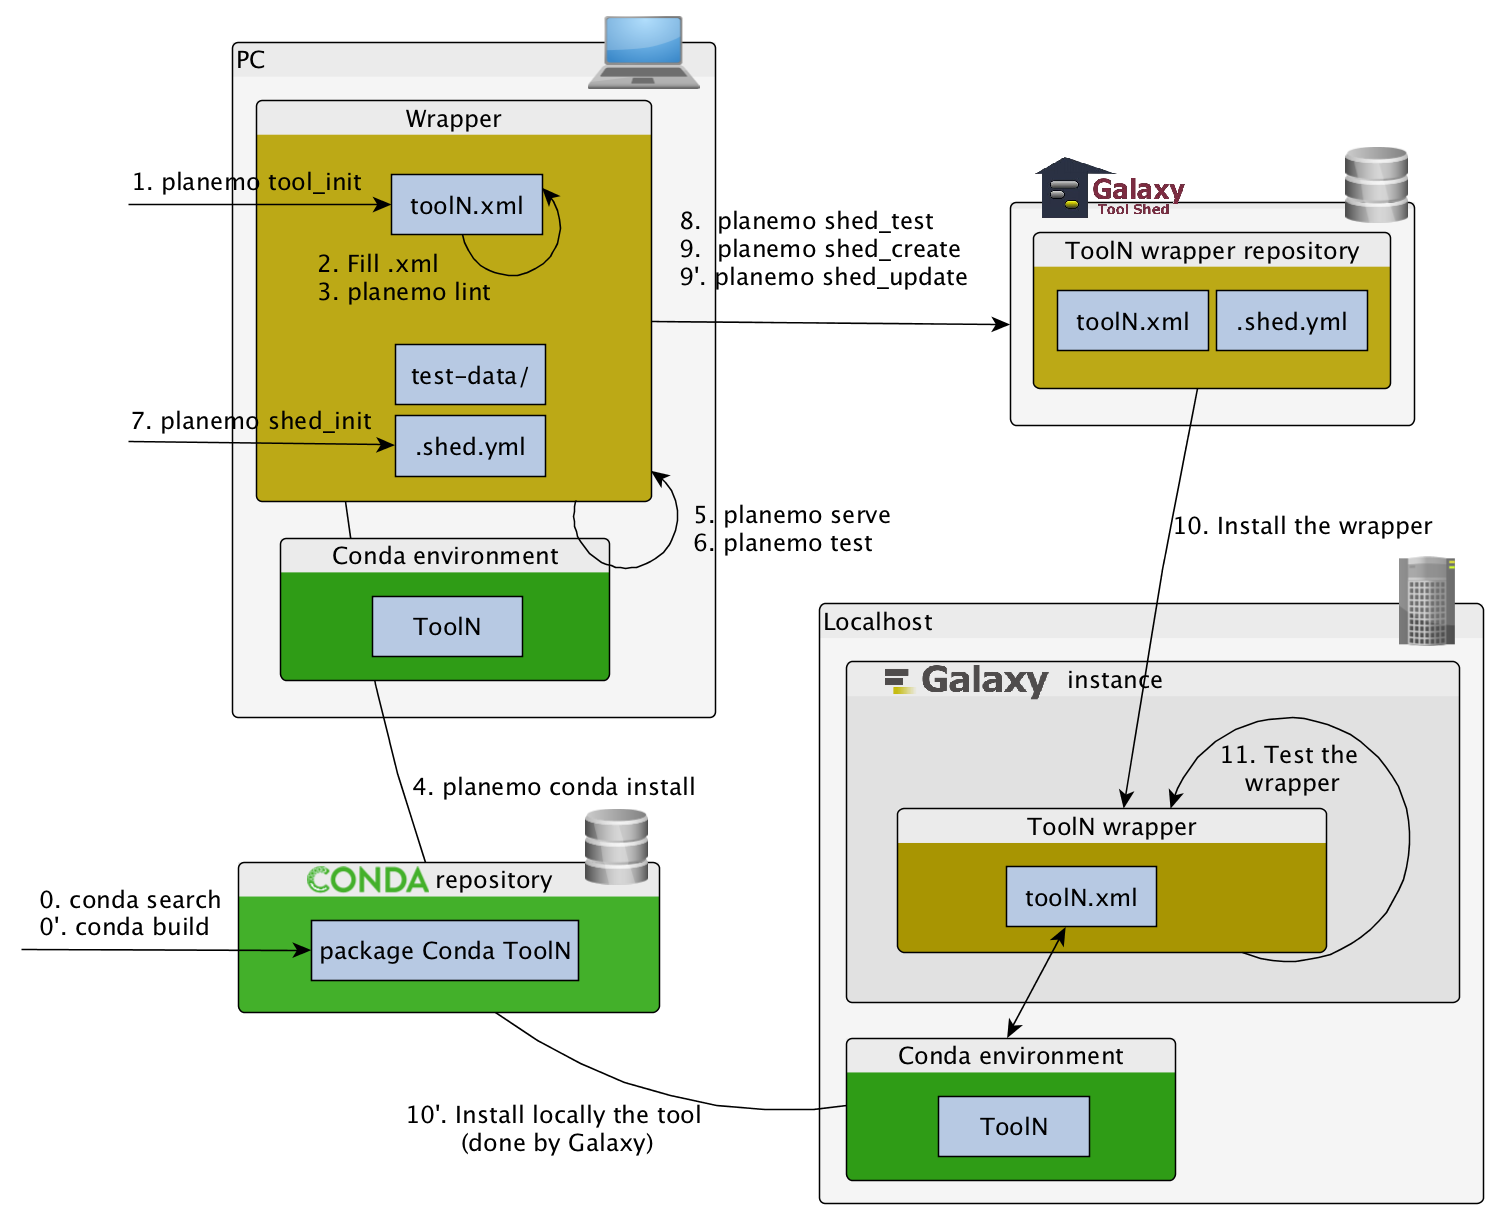
Planemo workflow
Command-line utilities to assist in building and publishing Galaxy tools.


Building Galaxy Tools
planemo tool_init
Creates a skeleton of xml file
$ mkdir new_tool
$ cd new_tool
$ planemo tool_init --id 'some_short_id' --name 'My super tool'
long version:
$ planemo tool_init --id 'samtools_sort' --name 'Samtools sort' \
          --description 'order of storing aligned sequences' \
          --requirement 'samtools@1.3.1' \
          --example_command "samtools sort -o '1_sorted.bam' '1.bam'" \
          --example_input 1.bam \
          --example_output 1_sorted.bam \
          --test_case \
          --version_command 'samtools --version | head -1' \
          --help_from_command 'samtools sort' \
          --doi '10.1093/bioinformatics/btp352'
Arguments help
$ planemo tool_init --help
planemo lint
Checks the syntax of a wrapper
$ planemo lint
Linting tool /opt/galaxy/tools/seqtk_seq.xml
Applying linter tests... CHECK
.. CHECK: 1 test(s) found.
Applying linter output... CHECK
.. INFO: 1 outputs found.
Applying linter inputs... CHECK
.. INFO: Found 1 input parameters.
Applying linter help... CHECK
.. CHECK: Tool contains help section.
.. CHECK: Help contains valid reStructuredText.
Applying linter general... CHECK
.. CHECK: Tool defines a version [0.1.0].
.. CHECK: Tool defines a name [Convert to FASTA (seqtk)].
.. CHECK: Tool defines an id [seqtk_seq].
Applying linter command... CHECK
.. INFO: Tool contains a command.
Applying linter citations... CHECK
.. CHECK: Found 1 likely valid citations.
planemo serve
View your new tool in a local Galaxy instance
$ planemo serve
Open http://127.0.0.1:9090/ in your web browser to view your new tool
planemo test
You can run tool’s functional test with this command.
$ planemo test
All 1 test(s) executed passed.
seqtk_seq[0]: passed
Hands-on
Setup
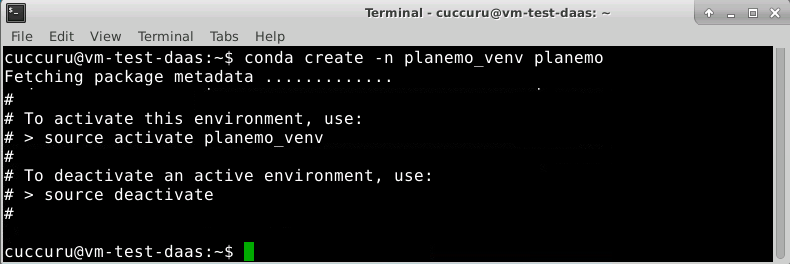
Create a new virtual environment planemo_venv and install Planemo on it.
$ conda create -n planemo_venv planemo

Conda create an isolated Python environments which contains all the necessary executables to use the packages that your Python project would need. If you’ve used pip and virtualenv in the past, you can use conda to perform all of the same operations.
Pip is a package manager, and Virtualenv is an environment manager. Conda is both.
See conda vs. pip vs. virtualenv
To begin using the virtual environment created by conda, it needs to be activated:
$ source activate planemo_venv
The name of the current virtual environment will now appear on the left of the prompt to let you know that it’s active. From now on, any package that you install using conda or pip will be placed into the planemo virtual environment, isolated from the global Python installation.

Congratulations, your Planemo’s installation is ready to go. Try it:
$ planemo --version
To deactivate the virtual environment, type:
$ deactivate
Hands-on 1
Goal:
Develop a simple FASTQ2FASTA converter using Seqtk, a tool for processing sequence data in FASTA and
FASTQ files
Before:
observe and test Seqtk
$ seqtk
$ seqtk seq
$ wget https://raw.githubusercontent.com/galaxyproject/galaxy-test-data/master/2.fastq
$ cat 2.fastq
$ seqtk seq -A 2.fastq > 2.fasta
$ cat 2.fasta
Steps:
- Create a new directory for your tool, cd into it
- Init the wrapper with planemo tool_init
- Fill the template
- Check the syntax with planemo lint
- Display the tool with planemo serve
- Try it with a file
Hands-on 2
Goal:
Improve your FASTQ2FASTA wrapper.
Steps:
Fill (seriously :) the template (planemo tool_init –help)
- Have you added tool xml version?
- Have you added command version?
- Have you added requirements?
- Have you added help section?
- Have you added citations section?
- Have you generated a test case?
- Check the syntax with planemo lint
- Test the template with planemo test
Publishing Galaxy tools
planemo config_init
Configure a Shed Account
This command will populate a template ~/.planemo.yml file and provide locations to fill in shed credentials for the test and main Tool Sheds.
$ planemo config_init
$ cat ~/.planemo.yml

## Planemo Global Configuration File.
## Everything in this file is completely optional - these values can all be
## configured via command line options for the corresponding commands.

## Specify a default galaxy_root for test and server commands here.
#galaxy_root: /path/to/galaxy_root
## Username used with toolshed(s).
#shed_username: "<TODO>"
sheds:
  # For each tool shed you wish to target, uncomment key or both email and
  # password.
  toolshed:
    #key: "<TODO>"
    #email: "<TODO>"
    #password: "<TODO>"
  testtoolshed:
    #key: "<TODO>"
    #email: "<TODO>"
    #password: "<TODO>"
  local:
    #key: "<TODO>"
    #email: "<TODO>"
    #password: "<TODO>"
planemo shed_init
Init a repository
A single GitHub repository or locally managed directory of tools may correspond to any number of Tool Shed repositories.
Planemo maps files to Tool Shed repositories using a special file called .shed.yml.
$ planemo shed_init --name="my_tools"
                    --owner="my-self"
                    --description="best_tool_in_town"
                    [--remote_repository_url=<URL to .shed.yml on github>]
                    [--homepage_url=<Homepage for tool.>]
                    [--long_description=<long description>]
                    [--category=<category name>]
$ cat .shed.yml

categories: []
description: best_tool_in_town
name: my_tools
owner: my-self
planemo shed_create
Create a repository
Planemo can be used to used to publish “repositories” to the Tool Shed.
$ planemo shed_create --shed_target your_toolshed_label
planemo shed_update
Update a repository
Modified artifacts can be uploaded using the following command.
$ planemo shed_update --check_diff --shed_target your_toolshed_label
The –check_diff option here will ensure there are significant differnces before uploading new contents to the tool shed.
Hands–on
Hands-on 3
Goal:
Publish your new shiny wrapper to the test toolshed.
Steps:
- If you don’t have one, create an account on the TestToolShed
- Configure a shed account
- Create a toolshed repository
- Update your wrapper then check diff between the shed repository and your local copy
- Update the shed repository