Get a basic Galaxy server up and running
Here you will find information on obtaining and setting up a Galaxy instance with default configuration.
Reasons to Install Your Own Galaxy
You need to download Galaxy if you plan to:
- Run a local production Galaxy because you want to
- Install and use tools unavailable on public Galaxies
- Use sensitive data (e.g. clinical)
- Process large datasets that are too big for public Galaxies
- Plug-in new datasources
- Develop Galaxy tools
- Develop Galaxy itself
Requirements
- Any Linux or Mac OS
- Python 2.7
Optionals
- samtools (metadata etc.)
- Git code versioning system
- GNU Make + gcc to compile and install tool dependencies
- Additional requirements for shipped tools
Get Started
For Production or Single User
If setting up or running a production Galaxy service or creating your own personal Galaxy instance, use the latest release branch, which only receives stable code updates.
Cloning new
If you do not have a Galaxy repository yet or you do not want to update the existing instance, run:
$ git clone -b release_17.05 https://github.com/galaxyproject/galaxy.git
Updating exiting
If you have an existing Galaxy repository and want to update it, run:
$ git checkout release_17.05 && git pull --ff-only origin release_17.05
For Development
To obtain Galaxy for development, use the default branch after cloning: dev.
This is the branch that pull requests should be made against to contribute code (unless you are fixing a bug in a Galaxy release).
$ git clone https://github.com/galaxyproject/galaxy.git
Start It Up
To start Galaxy, simply run the following commands:
$ cd galaxy && sh run.sh
This will start up the Galaxy server on localhost and port 8080.
Galaxy can then be accessed from a web browser at http://localhost:8080.
What happened?
- Galaxy started logging into the terminal from which it is run.
- Galaxy created a Python virtual environment (venv) in
.venv/. - Galaxy sourced this environment (
$ source .venv/bin/activate) - Galaxy fetched needed Python binaries (‘wheels’) into this environment.
- Galaxy created the default SQLite database and migrated it to the latest version.
- Galaxy bound to the default port
8080onlocalhost.
All of the above can be configured.
Look around
- Run a basic job (e.g. upload a file).
- Check http://localhost:8080/api/version to see Galaxy’s version.
Stopping Galaxy
To stop the Galaxy server, use Ctrl-C in the terminal window from which Galaxy is running.
Start/stop in the background
Start
$ sh run.sh --daemon
  ...
Activating virtualenv at .venv
Entering daemon mode
Monitor
$ tail -f paster.log
  ...
Starting server in PID 1469.
serving on http://127.0.0.1:8080
Stop
$ sh run.sh --stop-daemon
Basic configuration
- Galaxy works out of the box with default configuration.
- Most important config files are in
config/.- galaxy.ini Main configuration file
- datatypes_conf.xml List of data types available
- tool_conf.xml Tools configuration file
- tool_shed.ini Tool Shed configuration file
- tool_sheds_conf.xml List of tools installed from Tool Shed
- Galaxy often uses the files with suffix
*.sampleas declared defaults.
Make your own config
- Copy the provided sample and open editor.
$ cp config/galaxy.ini.sample config/galaxy.ini $ nano config/galaxy.ini - Uncomment/Set the following entries.
message_box_visible = True message_box_content = "Hey, at least I'm not a popup!" message_box_class = info - (Re)start Galaxy
Next Steps
Become an Admin
To control Galaxy through the UI (installing tools, managing users, creating groups, etc.), users must become an administrator. Only registered users can become admins. To give a user admin privileges, complete the following steps:
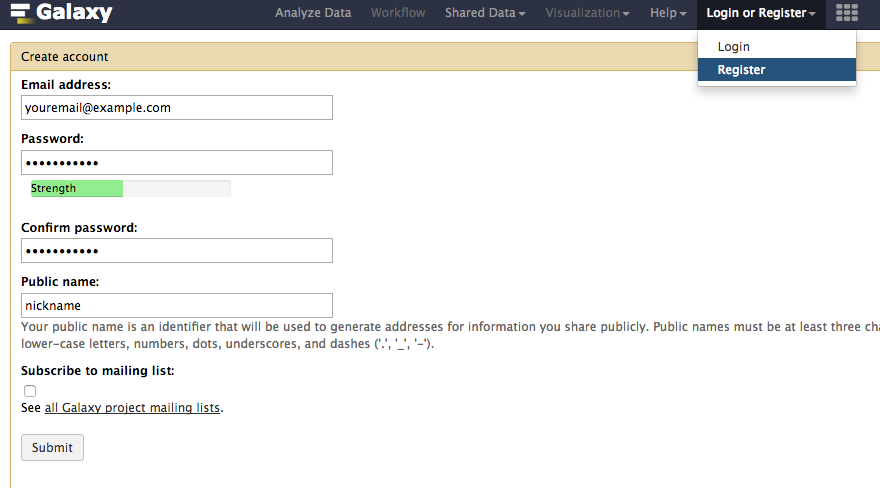
- Create an account (User -> Register)
- Create a user using Galaxy interface.
- Add the user’s Galaxy login email to the configuration file config/galaxy.ini. As shown here:
# this should be a comma-separated list of valid Galaxy users admin_users = user1@example.com,user2@example.com - (Re)start Galaxy.
Update the welcome page
Welcome page is $GALAXY_ROOT/static/welcome.html and is the first thing that users see. It is a good idea to extend it with things like:
- Downtimes/Maintenance periods
- New tools
- Publications relating to your Galaxy
No restarting is necessary.
Install Tools
Galaxy comes with a small set of basic tools pre-installed. To install additional tools, follow the instructions on Installing tools into Galaxy from the Tool Shed.
Join the Mailing List
To stay up-to-date on new Galaxy features and bug fixes, as well as to discuss future features, consider joining the Galaxy Developers mailing list. See Mailing Lists for other options.
Keep your instance backed up
Like any other application, Galaxy directories and Galaxy database tables should be backed up, and any disaster recovery plans should be regularly tested to make sure everything is working as expected.
Configure for production
The above instructions are intended for users wishing to develop Galaxy tools and Galaxy itself. To deploy a production-ready installation of Galaxy, some changes from the default configuration are highly recommended. If nothing else, switching to PostgreSQL or MySQL (from the default SQLite) is heavily endorsed to prevent database locking issues that can arise with multiple users.
Please see the Running Galaxy in a production environment page for more details.
Keep your code up to date
Galaxy development occurs in GitHub.
Changes are stabilized in the release_YY.MM branches and then merged to master for each YY.MM.point release
At any time, you can check to see if a new stable release is available by using the git log command:
$ git log ..origin/master
commit 3a2ff46c28172ef78510f4bea2f4be75ce660667
Merge: 8b538f17f 90de3f258
Author: Martin Cech <cech.marten@gmail.com>
Date:   Wed Feb 22 10:56:57 2017 -0500

    Merge branch 'release_17.01'
If git log produces no output, Galaxy is up-to-date. If git log produces a list of commits, a new version is available. You can pull the commits to your local Galaxy clone with:
$ git pull
Hands On
- Get Galaxy
$ git clone https://github.com/galaxyproject/galaxy.git - Start Galaxy
$ cd galaxy $ sh run.sh - Browse local Galaxy on
http://127.0.0.1:8080/ - Create an account
Login or Register -> Register
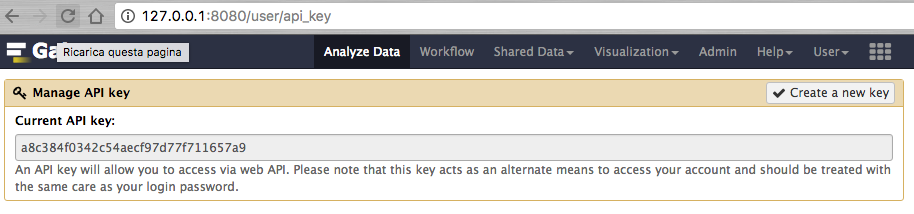
- Generate API Key
User -> Preferences -> Manage API Key -> Create a new key
- Became Admin
- Open a new Terminal and add the user’s Galaxy login email to the configuration file config/galaxy.ini
$ cp config/galaxy.ini.sample config/galaxy.ini
$ nano config/galaxy.ini
# this should be a comma-separated list of valid Galaxy users admin_users = youremail@example.com
- Open a new Terminal and add the user’s Galaxy login email to the configuration file config/galaxy.ini
- Restart Galaxy
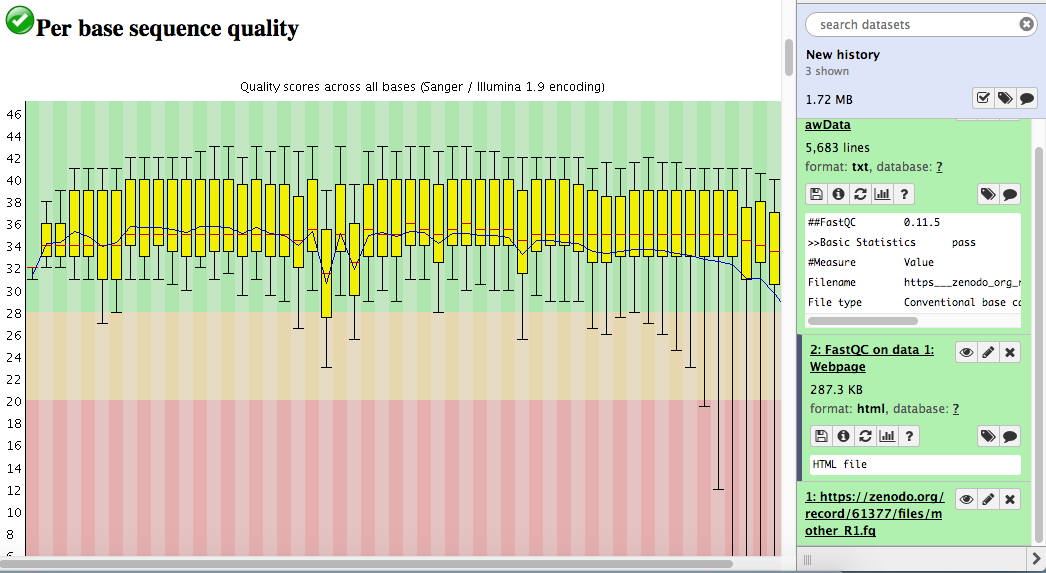
- Install FastQC tool from ToolShed
- Go to the admin interface and click on “Search Tool Shed”
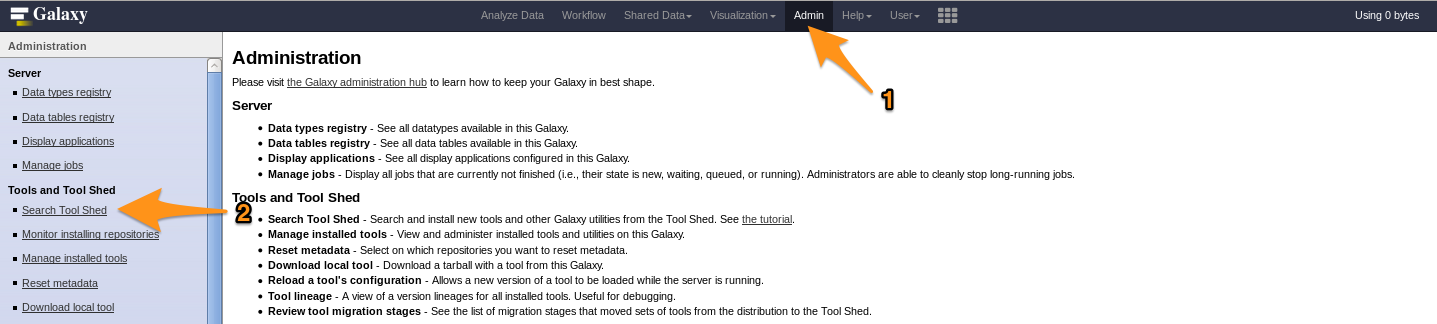
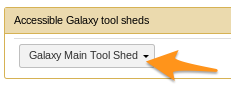
- Select a Tool Shed
- Search FastQC tool
- Install FastQC tool
- Go to the admin interface and click on “Search Tool Shed”
- Upload into a new history datasets from local path
/home/utente/zenodo - Launch FastQC tool against previous datasets